





The 30-day checklist for a new group owner
Week 1 logo and first offer, week 2 get people in, week 3 links and first event, week 4 read the stats and sign a partner. The new group owner checklist.

You just created a group. The screen is empty and you have a team, a store or a league to run on top of it. Here is the new group owner checklist for the first 30 days: four weeks, one job per week, and a group that pays for itself by day 30. No theory. Just what to click and what to print.
The checklist is written for someone with about two hours a week. If you have more, go faster. If you have less, do week one and week two and the group already beats your newsletter.
Week 1: make it look like yours
A blank group does not get scanned. The first week is about making it look like it belongs to the team, and giving members one reason to open it.
Logo and cover
Upload the logo and a cover photo. Use a real photo from your rink, your store or your last event, not a stock image. Members see this the second they scan. It has to say "this is us".
First offer
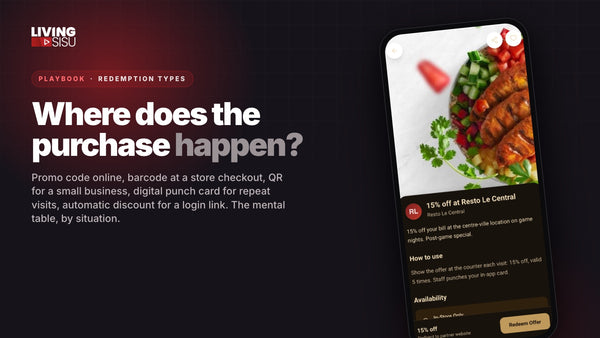
Pick the partner you already know best: the team store, the restaurant that sponsors the banquet, the shop that sharpens the skates. Enter the partner (about two minutes) and one offer. Choose the format that fits the counter:
- Promo code for an online store.
- Barcode scanned at the register.
- QR code shown at the counter.
- Digital punch card for repeat visits.
- Automatic discount when the store can apply it.
The first offer has to be usable within days, in person. "15 percent off at the store" beats "10 percent off your next season ticket".
Week 1 is done when
Logo up, cover up, one partner, one offer, and you have scanned the group QR from your own phone to see what members see.
Week 2: get people in
Now the group is worth opening. Time to fill it.
Open the share page. You get a high-resolution QR to print, a group code, a link, and email invitations with a message you can customize. Use all four in the same week:
- Print the QR and put it where people stand still: ticket window, store counter, front desk, the program.
- Post the link in the places you already control: the team website, the league page, the bottom of the ticket confirmation email.
- Read the group code out loud at your next game or meeting.
- Send the email invitation to your existing list, with one line about the offer.
A realistic target: a junior team with 1,200 fans a game gets 150 to 250 members in the first two weekends. A store with 800 customers on its list gets 100 to 150 from the email alone. A league with 30 teams gets there faster by asking each team manager to share the code once.
Open the stats the morning after each push. You will see how many joined and whether they came from QR, code, link or email. Whatever channel won, do more of it.
Week 3: give them reasons to come back
Members who joined for one offer will drift unless the group becomes the place they check. Week three builds that habit.
Useful links
Add the links people ask you for every week. For a team: schedule, tickets, store. For a store: online shop, hours, loyalty page. For a league: standings, schedule, registration. The Free plan gives you two useful links, Premium twelve, Pro unlimited. Start with the two everyone asks about.
Resources
Post the documents you keep re-sending: the parking map, the arena rules as a PDF, the tryout dates, the return policy. Every resource you post is one email you stop writing.
First event
Create one event with date, time, location, GPS map, price if there is one, and the sign-up button. The next home game. The fan skate. The in-store signing. Members get one place to see it and one button to act.
By the end of week three, a member who opens the group finds an offer, the links they need, the documents they used to ask for, and the next thing happening. That is a reason to come back.
Week 4: read the numbers and sign the first real partner
You have a month of data. Use it.
What to read in the stats
- Opens per day: which days are alive, which are dead. Post on the alive ones.
- Where members came from: QR, code, link or email. Your best channel for next month.
- Most viewed content: if the schedule link beats everything, put the next offer right beside it.
- Tracked share links (Premium): clicks and sign-ups per link, so you know which poster earned its spot.
The partner conversation
Now go see a partner with numbers instead of a favour. "We have 250 members. Last month the store offer was viewed 900 times and 60 members used it." Then propose the deal that pays for the group: a members-only discount plus a commission on member purchases.
The math you bring to the meeting: 250 members, 20 percent buy, 100 dollar average basket, 20 percent commission. That is 1,000 dollars back to the group from one offer. Premium costs 990 dollars a year. One partner, and the group is paid. Everything after that is upside, and the partner finally sees what the sponsorship sends through the door.
The 30-day checklist in order
- Days 1 to 7: upload the logo and a cover photo, enter your first partner, publish one offer usable in person this week, scan the QR yourself.
- Days 8 to 14: print the QR, post the link, read the group code out loud, send the email invitation, check the stats the next morning.
- Days 15 to 21: add the useful links, post the resources you keep re-sending, create the first event with a sign-up button.
- Days 22 to 30: read opens per day, member sources and most viewed content, then meet your first partner with those numbers and propose a commission deal.
What to leave for month two
Chat, member tiers and loyalty points are Pro features and they are worth it, but not in the first 30 days. Get the basics working first. Then add an announcements room where only you post, a tier for season-ticket holders, and a points program under your name with rewards from your partners.
Two things to keep in mind on any plan. You never see your members' last names, emails or photos, which is why they join without hesitating. And if you ever go down a plan, nothing is deleted: extra content is archived and printed QR codes keep working.
FAQ
Which plan should a new group owner start with?
Free, at 0 dollars: five offers, five resources, five events, two useful links, basic stats. Enough to finish this checklist. Move to Premium (990 dollars a year) when you want tracked share links and full stats.
Do I have to find the partners myself?
Yes. The offers come from your own businesses: the store, the sponsor, the restaurant near the rink. Entering a partner takes about two minutes, and the stats show what each offer brings.
Do members pay to join my group?
Never. Members open the group from their free AthleteCard. You choose the plan, they pay nothing.
Create your group
Day one starts with a logo and a cover photo. Create your group on my.livingsisu.com and start the checklist today.